
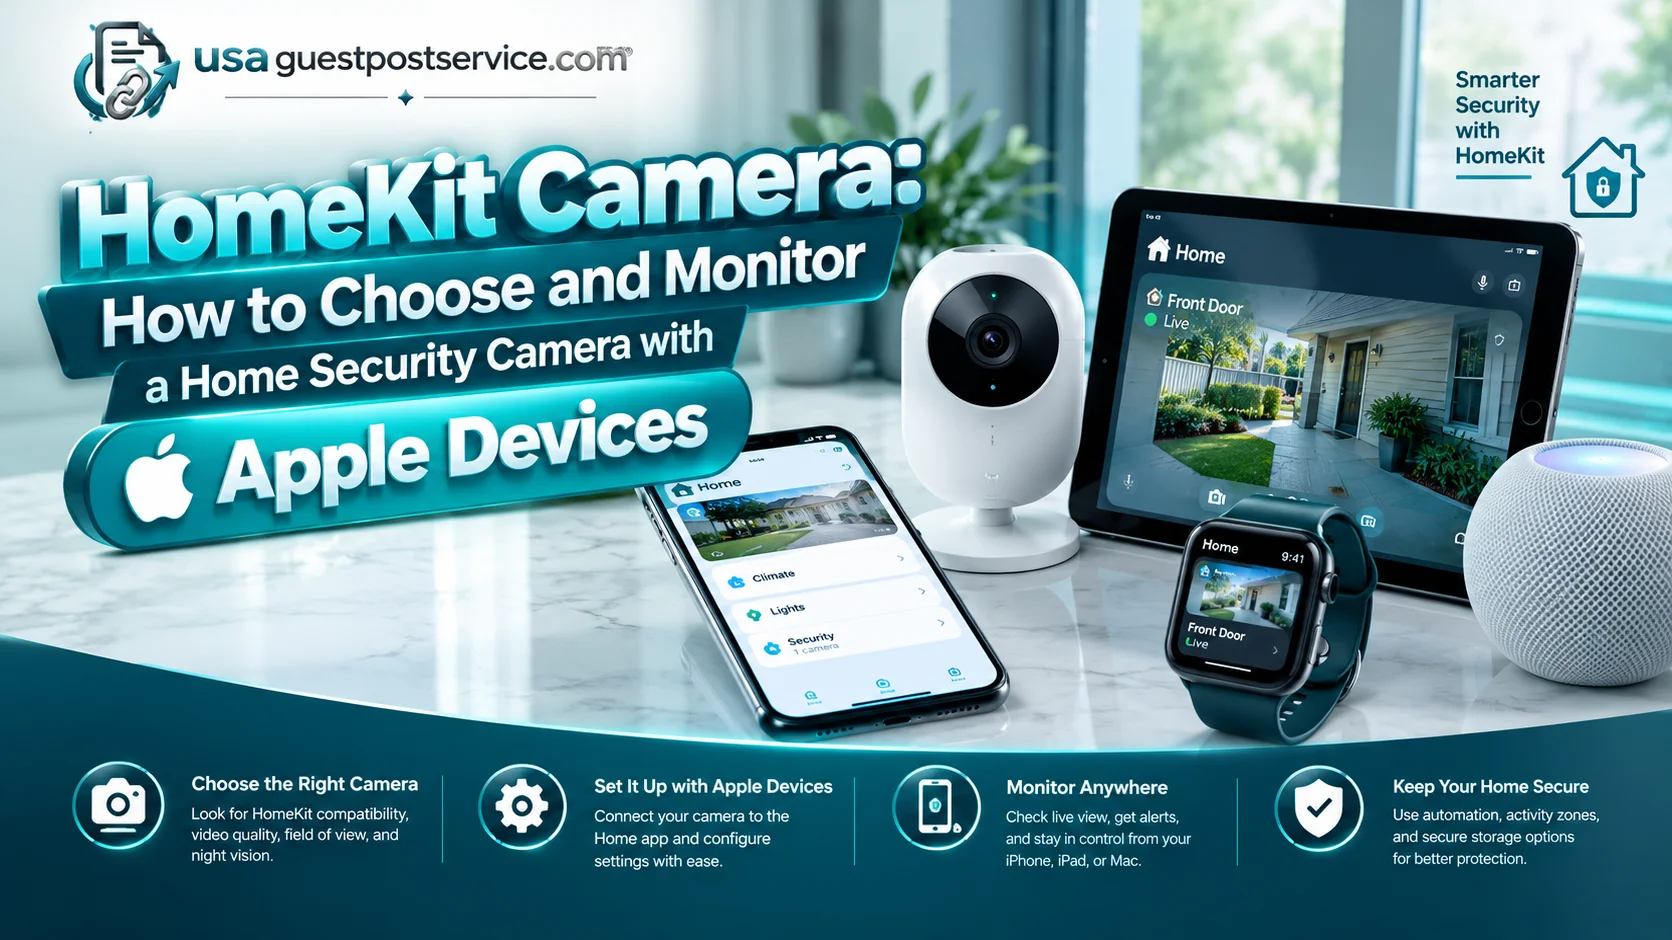
A HomeKit camera lets you view a compatible security camera through Apple’s Home app on an iPhone or iPad. Supported cameras can also be viewed on Apple TV 4K, while cameras that support HomeKit Secure Video offer additional recording and privacy features.
The important distinction is that Apple Home compatibility does not automatically mean a camera supports HomeKit Secure Video, and a camera’s advertised resolution does not necessarily match its recording resolution through Apple’s system. These differences affect which features you can use, what equipment you need, and whether a camera meets your monitoring requirements.
This guide explains how HomeKit cameras work, how to monitor them using Apple devices, what HomeKit Secure Video requires, and how to compare camera specifications before purchasing.
What Is a HomeKit Camera?
A HomeKit camera is a security camera compatible with Apple’s smart home platform. Compatibility allows supported camera features to be accessed through Apple’s Home app, including live video streams, activity notifications, and camera-sharing controls.
Depending on the model, you might use a HomeKit camera to monitor a front entrance, living room, garage, driveway, or backyard. The available features depend on the camera, its configuration, and the Apple Home functionality it supports.
Before buying, check the exact model against Apple’s Home accessories directory. A general claim that a camera works with Apple devices is not enough to establish that it supports every Apple Home feature.
Apple Home Compatibility vs. HomeKit Secure Video
Apple Home compatibility and HomeKit Secure Video are related but distinct.
Apple Home compatibility allows you to access supported camera features through the Home app. HomeKit Secure Video adds recording and encrypted iCloud storage for eligible cameras when the required subscription and home setup are in place.
| Capability | Apple Home-compatible camera | HomeKit Secure Video-compatible camera |
| View supported live video in the Home app | Yes | Yes |
| Configure supported activity notifications | Yes | Yes |
| Record eligible footage through HomeKit Secure Video | Not necessarily | Yes, with the required setup |
| Store eligible recordings in iCloud through HomeKit Secure Video | Not necessarily | Yes, with an eligible iCloud+ plan |
| Use additional HomeKit Secure Video recording and detection features | Not necessarily | Depends on camera support and configuration |
The distinction matters when comparing cameras. A model may work with Apple Home for live viewing but lack HomeKit Secure Video support. Another may support HomeKit Secure Video but have limitations on resolution or camera controls when operating in that mode.
Before purchasing, verify both Apple Home compatibility and HomeKit Secure Video support. Then check the specific functions available through each system.
Apple explains the distinction in its guide to setting up security cameras in Home on iPhone.
How to Monitor a HomeKit Camera on an iPhone or iPad
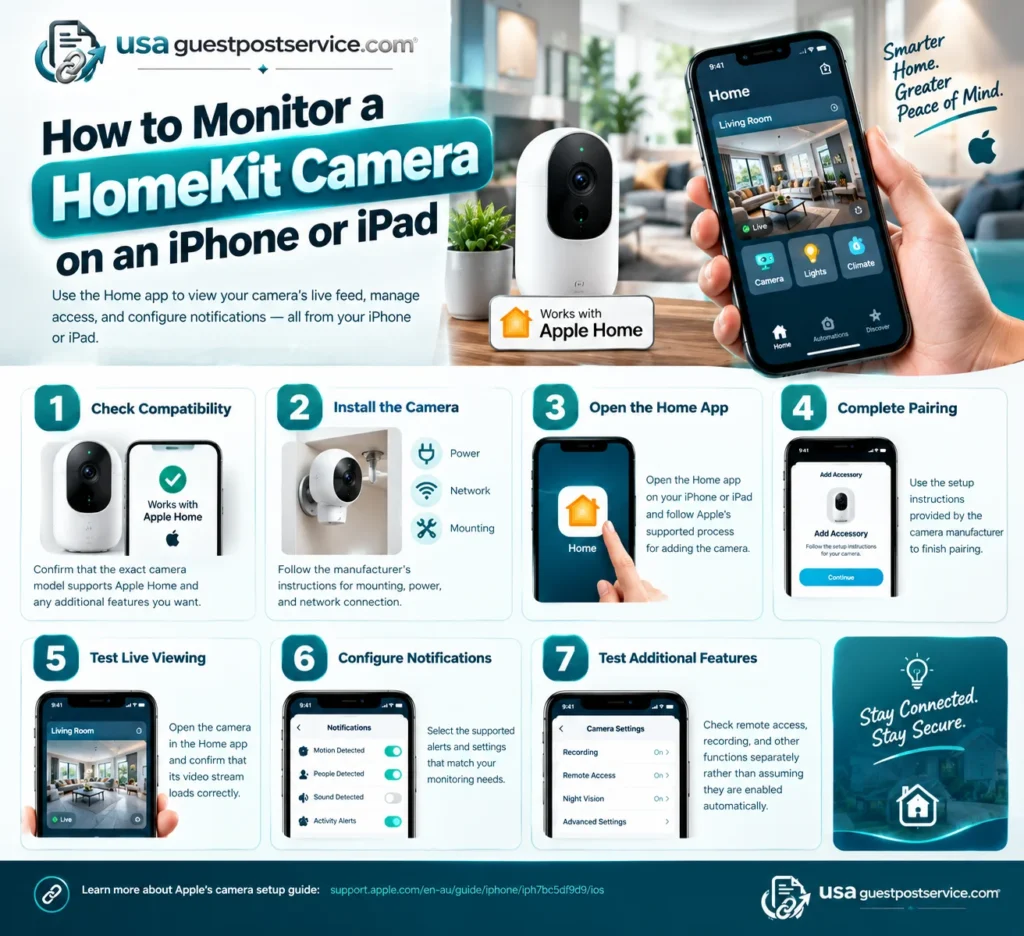
You can monitor a compatible camera through the Home app on your iPhone or iPad. After adding the camera successfully, you can open its supported live feed, manage access, and configure available notifications.
The exact pairing process varies by manufacturer, but the general setup follows these steps:
- Check compatibility. Confirm that the exact camera model supports Apple Home and any additional features you want.
- Install the camera. Follow the manufacturer’s instructions for mounting, power, and network connection.
- Open the Home app. Follow Apple’s supported process for adding the camera to your home.
- Complete pairing. Use the setup instructions supplied for the particular camera model.
- Test live viewing. Open the camera in the Home app and confirm that its video stream loads.
- Configure notifications. Select the supported alerts and settings that match your monitoring needs.
- Test additional features. Check remote access, recording, and other functions separately rather than assuming they are enabled automatically.
Apple’s camera setup guide explains the supported features and setup options.
Live Viewing, Notifications, and Remote Access
Live viewing allows you to check what a camera sees at that moment. Notifications can alert you to activity detected by a compatible camera, subject to its capabilities and your settings.
HomeKit Secure Video adds more specific options for supported cameras. Depending on the model and configuration, these can include notifications for people, animals, vehicles, or packages, as well as activity zones that limit alerts to selected areas. Not every camera supports every detection type.
For example, a camera aimed at a front entrance may capture movement on a nearby sidewalk. If the camera and configuration support activity zones, you can focus notifications on the entrance rather than the entire field of view. This can reduce irrelevant alerts, although results depend on the camera’s view, lighting, and detection capabilities.
Remote monitoring also depends on the appropriate account, network, and configuration. If a camera works while you are at home but not when you are away, check its online status, the remote-access settings, and any home hub requirements that apply to the feature you are using.
Keep three functions separate:
- Live viewing: Accessing the camera’s current video stream.
- Activity notifications: Receiving alerts when supported activity is detected.
- Recording: Saving and reviewing eligible footage through a supported recording system.
A camera that performs one function successfully is not necessarily configured for the other two.
Can You View a HomeKit Camera on Apple TV?
Yes. Apple TV 4K supports viewing compatible Apple Home security cameras through its Apple Home interface. Supported configurations can display multiple camera feeds or show a camera in Picture in Picture while you watch other content. Feature availability depends on the Apple TV hardware, software, region, and configuration.
To view a camera:
- Make sure the camera has been added to Apple Home.
- Confirm that Apple TV 4K and the relevant Apple devices are configured with the appropriate Apple Account.
- Press and hold the TV button on the Apple TV remote to open Control Center.
- Navigate to the Apple Home tab.
- Select an individual camera or choose All Cameras to access the supported multi-camera view.
The interface and available controls may vary by tvOS version and device. Follow Apple’s current Apple TV 4K camera-monitoring guide for the supported procedure.
Viewing a camera on Apple TV can be convenient when you want to check an entrance or monitor several areas on a larger screen. However, being able to view a camera on Apple TV does not, by itself, confirm that HomeKit Secure Video recording is configured. Viewing and recording have separate requirements.
HomeKit Secure Video: Recording, iCloud+, and Home Hub Requirements
HomeKit Secure Video is Apple’s system for recording and reviewing eligible security-camera footage through the Home app and iCloud. It provides encrypted video storage and supported recording features beyond basic Apple Home camera compatibility.
To use HomeKit Secure Video recording, you need a compatible camera, an eligible iCloud+ subscription, a supported and configured home hub, and the required account and Home settings. Apple’s HomeKit Secure Video guide explains how recording and iCloud storage work.
How iCloud+ affects camera limits
Apple’s published HomeKit Secure Video allowances are based on the iCloud+ plan:
| iCloud+ plan | Supported HomeKit Secure Video camera allowance |
| 50 GB | One camera |
| 200 GB | Up to five cameras |
| 2 TB | Unlimited cameras |
| 6 TB | Unlimited cameras |
| 12 TB | Unlimited cameras |
Apple states that eligible HomeKit Secure Video footage does not count toward the regular iCloud storage allowance and that the Home app can display up to 10 days of activity history. These allowances are documented in Apple’s current encrypted camera footage and iCloud guide.
The camera allowance and the storage used by your other iCloud content are separate considerations. Eligible HomeKit Secure Video recordings do not consume the plan’s regular storage quota, but the subscription tier determines how many cameras you can add for this feature.
Check Apple’s current plan details before purchasing a subscription, since available plans and feature requirements may change.
Why do you need a home hub?
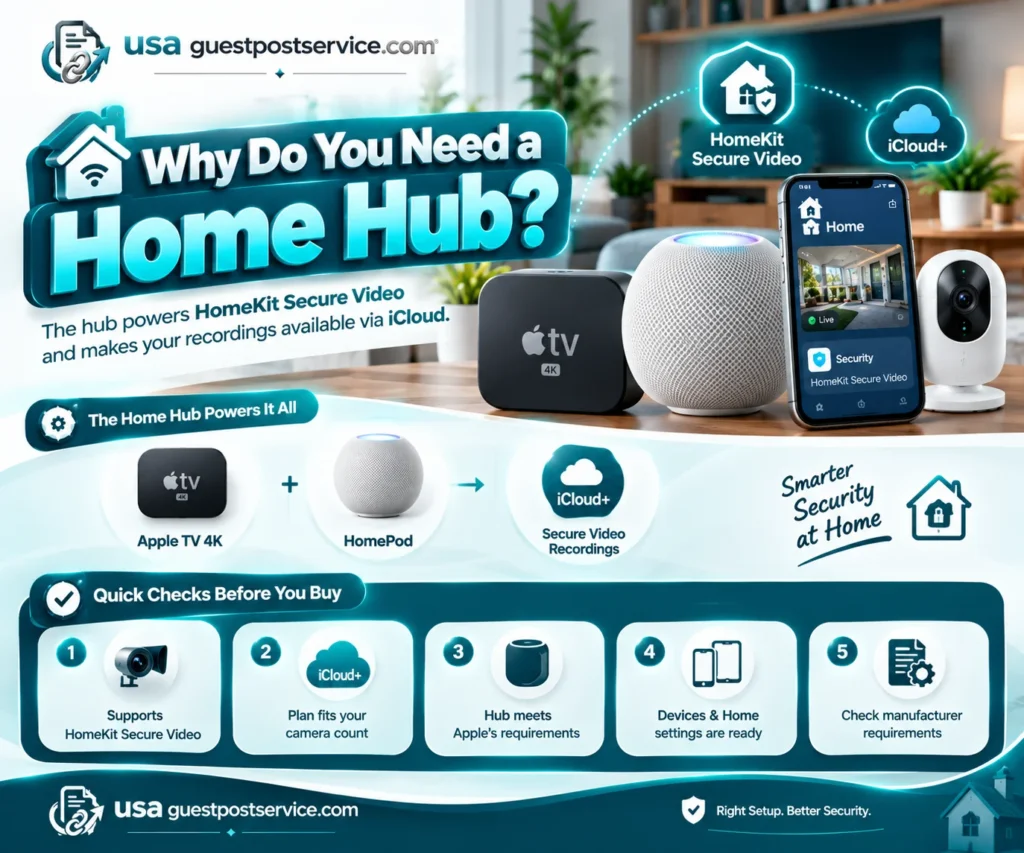
A supported home hub is part of the HomeKit Secure Video recording setup. Apple documents supported Apple TV 4K and HomePod configurations for these features. The home hub handles supported video analysis and helps make eligible recordings available through iCloud.
Do not assume that every camera function has identical requirements. Pairing a compatible camera, viewing its live stream, accessing it remotely, and recording footage through HomeKit Secure Video are distinct tasks.
Before relying on HomeKit Secure Video, confirm that:
- The exact camera model supports HomeKit Secure Video.
- Your iCloud+ plan supports the number of cameras you intend to use.
- Your home hub meets Apple’s current requirements and is configured correctly.
- Your Apple devices and Home settings are set up appropriately.
- The manufacturer documents any additional requirements for the model.
These checks help avoid buying a camera for recording features that your existing setup cannot use.
How to Choose the Right HomeKit Camera
The right HomeKit camera depends on the area you want to monitor, the features you need, and the Apple devices you already own. Resolution matters, but so do compatibility, recording behavior, detection capabilities, power, network reliability, and privacy controls.
Start by deciding what the camera must do. Then verify that the specific model provides those functions through the system you intend to use.
Indoor vs. Outdoor Camera Requirements
Indoor and outdoor cameras operate in different environments, so their specifications should be evaluated against the installation location.
Indoor cameras may suit rooms, hallways, pets, or interior entrances. Consider the viewing angle, low-light performance, microphone and speaker capabilities if needed, and whether the camera can be positioned without unnecessarily recording private areas.
Outdoor cameras need to meet the environmental requirements of the intended location. Check the manufacturer’s weather-resistance rating, operating-temperature range, mounting instructions, power arrangement, and wireless connectivity requirements.
For either type, compare these features:
- Resolution: Higher resolution can capture more detail, but the result also depends on the sensor, lens, lighting, and video processing.
- Night vision: Check the manufacturer’s stated low-light capabilities and whether they suit the area you want to monitor.
- Motion detection: Verify which activities the camera detects and which notifications are supported through Apple Home.
- Field of view: A wider view may cover more space, while a narrower view may suit a specific entrance or passage.
- Power source: Wired, plug-in, and battery-powered models have different installation and maintenance requirements.
- Connectivity: The camera needs a reliable connection to deliver its supported features.
- Audio: If two-way communication or sound monitoring matters, verify the exact model’s capabilities and whether they work through Apple Home.
- Privacy controls: Check how the camera handles recording, sharing, activity zones, and private areas.
A camera with impressive specifications may still be unsuitable if its connection is unreliable at the installation point or if the features you need are unavailable through Apple Home.
Why advertised 2K resolution may not mean 2K HomeKit Secure Video recording
A camera’s advertised resolution describes one part of its capabilities. It does not automatically establish the resolution available through every app or recording method.
Consider the Aqara Camera Hub G3. Aqara lists its sensor resolution as 2304 × 1296 pixels, marketed as 2K. The manufacturer also states that, in HomeKit Secure Video mode, the camera records in Full HD 1080p and does not provide pan/tilt controls through that mode.
This example illustrates why the following specifications should be checked separately:
- Native or advertised resolution: The camera’s stated sensor or maximum resolution.
- Manufacturer-app resolution: The resolution and controls available in the camera’s own application.
- Apple Home live-view resolution: The resolution actually supported when viewing the camera through Apple Home.
- HomeKit Secure Video recording resolution: The resolution used for eligible recordings through Apple’s service.
The exact capabilities depend on the model and its supported operating modes. Do not assume that a camera marketed as 2K will deliver 2K video in Apple Home or HomeKit Secure Video.
If image detail is important to your decision, look for manufacturer documentation that explicitly describes the resolution available in the mode you intend to use.
Pre-Purchase Compatibility Checklist
Use this checklist to compare a camera’s advertised features with what your Apple Home setup can actually support.
| What to verify | Why it matters |
| Exact model and hardware revision | Similar product names may cover different specifications or capabilities. |
| Apple Home compatibility | Confirms integration with the Home app for supported functions. |
| HomeKit Secure Video support | Establishes whether the model supports Apple’s recording system. |
| Resolution in each operating mode | Prevents confusion between native resolution, live viewing, and recording. |
| iCloud+ camera allowance | Ensures the subscription supports your intended number of cameras. |
| Home hub requirements | Confirms that your existing setup supports the functions you need. |
| Apple TV 4K support | Helps establish whether the camera can be viewed through your television setup. |
| Night vision and field of view | Helps determine whether the camera suits the monitoring location. |
| Detection and notifications | Confirms which activity types and alerts are actually supported. |
| Power and network requirements | Helps establish whether installation is practical at the intended location. |
| Manufacturer app versus Apple Home features | Identifies functions that may not be available through Apple’s interface. |
| Privacy and sharing controls | Helps you manage who can view streams and recordings. |
For example, if a product advertises 2K resolution, check whether that resolution is supported in the manufacturer’s app, Apple Home live viewing, and HomeKit Secure Video recording. If you need pan/tilt controls, verify their availability in the specific mode you plan to use.
A product listing may describe the camera’s broad capabilities, but the manufacturer’s current specification and support pages are better sources for model-specific limitations.
HomeKit Camera Privacy and Security
A HomeKit camera can make home monitoring convenient, but privacy depends on the camera, its configuration, account security, and where it is installed.
Apple states that HomeKit Secure Video recordings are end-to-end encrypted. Apple also explains that the home hub analyzes eligible video on-device to determine whether it should be recorded to iCloud. These protections apply to HomeKit Secure Video as documented by Apple; they should not be treated as a blanket guarantee about every camera, app, or connected device.
Encryption helps protect video, but it does not eliminate every possible security risk. Account compromise, inappropriate sharing, insecure device configuration, or vulnerabilities in a camera’s own software can still matter.
Use these practices to manage your setup:
- Secure your Apple Account. Use a strong password and enable available account-security protections.
- Keep software updated. Install supported updates for Apple devices, camera firmware, and network equipment.
- Review shared access. Allow only the people who need access to view streams or recordings, and review permissions when circumstances change.
- Position cameras carefully. Avoid recording private areas or capturing neighboring properties unnecessarily.
- Review recording settings. Where supported, configure camera activity and recording behavior to suit your household.
- Use activity zones when available. Focus detection on relevant areas to reduce unnecessary alerts.
- Check camera status. Review offline alerts and investigate interruptions that could prevent monitoring.
For indoor cameras, consider whether recording is appropriate in bedrooms, bathrooms, or other private spaces. Technical compatibility does not make every camera placement suitable.
Also consider visitors, children, household workers, and other people who may be recorded. Follow applicable laws and respect reasonable expectations of privacy.
Basic HomeKit Camera Troubleshooting
When a HomeKit camera stops working, identify the failed function first. A missing live feed, absent notifications, and unavailable recordings can have different causes.
1. The camera will not appear in Apple Home
Confirm that the exact model supports Apple Home. Check power and network connectivity, then follow the manufacturer’s pairing instructions. If setup still fails, consult the model-specific support guide.
2. The live feed will not load
Check whether the camera is powered on and online. If the manufacturer provides a separate app, test whether the camera is accessible there.
If the camera fails in both apps, investigate its power, network connection, and device status. If it works in the manufacturer’s app but not in Apple Home, review compatibility, pairing, and integration settings. This comparison can help narrow down the problem, but it does not establish the cause on its own.
3. Notifications are missing
Review the camera’s notification settings in Apple Home. Check which activity types are enabled and whether time-based settings or other conditions affect when alerts are sent.
Some detection options require HomeKit Secure Video support, and not every camera recognizes every activity type. Confirm the available features for your model.
4. Recordings are unavailable
Verify that the camera supports HomeKit Secure Video, that the required iCloud+ plan is active, and that the home hub and account settings meet Apple’s current requirements.
Basic Apple Home compatibility alone does not establish that HomeKit Secure Video recording is available.
5. Remote access does not work
Check your internet connection, camera status, relevant Apple Account settings, and the home hub configuration required for the feature. Test again after confirming that the camera and network are online.
6. The camera repeatedly goes offline
Look for weak wireless coverage, power interruptions, firmware issues, or recent network changes. For outdoor cameras, check whether the installation environment and operating conditions fall within the manufacturer’s specifications.
Avoid a factory reset as the first step. Resetting a camera may require you to repeat pairing and configuration. If simpler checks do not resolve the problem, follow the manufacturer’s instructions for that exact model.
Frequently Asked Questions
Can an Apple Home-compatible camera work without HomeKit Secure Video?
Yes. An Apple Home-compatible camera can provide supported live video and activity notifications without necessarily supporting HomeKit Secure Video. However, recording eligible footage through Apple’s service requires a compatible camera, an eligible iCloud+ plan, and the required home hub and account configuration.
Can I use a HomeKit camera as a baby monitor?
Possibly. Suitability depends on the camera’s audio support, night vision, notification options, connectivity, and the monitoring features you require.
A general security camera should not automatically be treated as a dedicated baby monitor. If you need continuous audio, specialized monitoring features, or functions designed specifically for infant care, verify that the exact model supports those requirements before relying on it.
Do all HomeKit cameras offer the same recording features?
No. Cameras can differ in HomeKit Secure Video support, recording resolution, detection capabilities, native storage options, and available controls. Two cameras may both work with Apple Home while providing different features.
Check the manufacturer’s specifications for the exact model, particularly if you need a specific resolution, pan/tilt control, or recording method.
Conclusion: Choose a HomeKit Camera That Fits Your Setup
Choosing a HomeKit camera starts with confirming compatibility and understanding the difference between live viewing and HomeKit Secure Video recording. The right camera should also provide the resolution, detection features, connectivity, and privacy controls you need for its intended location.
Before purchasing, verify the exact model’s Apple Home support, recording requirements, and resolution in the viewing or recording mode you plan to use. Check your existing Apple setup and iCloud+ plan rather than assuming that every advertised feature will be available automatically.
For more background on connected devices, explore our Smart Home category or read the Smart Home Setup Guide: AI, Automation & Security Explained.
The goal is to choose a camera whose documented capabilities match your monitoring needs—not simply one with the longest feature list.